Thursday, June 26, 2008

Mercurial Push from IntelliJ

I've been using IntelliJ on a recent project because of its Groovy and Mercurial support. The Mercurial support worked quite well except for pushing changes to a remote repository over ssh. A quick look at the Version Control Console revealed that things were getting hung up on: remote: ssh_askpass: exec(/usr/libexec/ssh-askpass): No such file or directory. After confirming that there was no ssh-askpass on my Mac OS X Leopard system, I turned to Google. After a few misses, I stumbled across Joe Mocker's blog post about VNC tunneled through SSH on OS X. Embedded in that post is this shell/AppleScript:

#! /bin/sh

#
# An SSH_ASKPASS command for MacOS X
#
# Author: Joseph Mocker, Sun Microsystems

#
# To use this script:
# setenv SSH_ASKPASS "macos-askpass"
# setenv DISPLAY ":0"
#

TITLE=${MACOS_ASKPASS_TITLE:-"SSH"}

DIALOG="display dialog \"$@\" default answer \"\" with title \"$TITLE\""
DIALOG="$DIALOG with icon caution with hidden answer"

result=`osascript -e 'tell application "Finder"' -e "activate" \
-e "$DIALOG" -e 'end tell'`

if [ "$result" = "" ]; then
exit 1
else
echo "$result" | sed -e 's/^text returned://' -e 's/, button returned:.*$//'
exit 0
fi


I dropped this code into a script at /usr/libexec/ssh-askpass and now when I push from IntelliJ:

Ugly, but it works. Now I just wish that the IntelliJ Mercurial plugin would consult the .hg/hgrc file for the remote repository or at least remember the value I type in when I pushed the last time, so I don't have to type in some long ssh://user@host.org/path/to/the/repo every time.

Thursday, June 12, 2008

PSICAT News

Last week I was in Potsdam, Germany for a meeting with folks from ICDP, ESO, and CoreWall. We were discussing integrating our various tools (PSICAT, Corelyzer, and the Drilling Information System) to create a turnkey technology platform for future ICDP and ESO drilling expeditions. Each of the tools have been used successfully on multiple expeditions, but until now haven't interoperated with each other. The meeting went well and we adjourned with an integration plan.

So what does this mean for PSICAT? First off, if you're an existing user, you won't have to do anything different; PSICAT will continue to work exactly as it does today. It will just have some new, optional features for integrating with the DIS and Corelyzer. One positive side effect of this is that I will have some "official" time devoted to working on PSICAT. Things have been so busy in the last couple of months that PSICAT development has been on the back burner. PSICAT won't be my only project but it should get more attention than it is getting now. It also means that PSICAT will be getting used all over the world on new drilling projects, which (I hope) leads to a larger user community and a better overall product.

Exciting times! Keep an eye on the PSICAT site for more updates.

Tuesday, June 10, 2008

GraphicsBuilder Update

Just a quick update to my previous post about GraphicsBuilder. All of the issues I had in Step #4 have been fixed, so you should no longer have to modify the pom.xml file or manually install Batik 1.7 jars. The only remaining issue is the requirement on Java 1.6, but Andres recently posted that the next version of GraphicsBuilder will not require Java 1.6.

Thursday, June 05, 2008

GraphicsBuilder Experimentation

This afternoon I was experimenting with GraphicsBuilder on Groovy, and I'm blown away. Andres has done an amazing job with GraphicsBuilder.

It took a bit of work to get setup because I wanted to play around with the SVG rendering support (which isn't included in the 0.5.1 package that is currently available). Once I built from the trunk, it worked like a charm. Below are the steps that I went through to set things up in case it is useful to anyone else.

Pre-requisites:
1) Java 6
Make sure you have Java 6 installed for your platform. I'm on a Mac which doesn't have Java 6 support (grr...) so I went the SoyLatte route.

2) Groovy 1.5
Make sure you have Groovy installed. I ran into troubles when I tried to use the 1.6 snapshot (ClassCastExceptions) so stick with 1.5 for now.

3) Maven 2
We'll be building GraphicsBuilder from the Subversion trunk, so we need to install Maven 2.

4) Subversion
Hopefully you already have the Subversion, but if not, grab and install it for you platform.

Instructions:
1) Setting up some environment variables at the commandline

export GROOVY_HOME=~/Source/groovy
export JAVA_HOME=/usr/local/java1.6
export PATH=$JAVA_HOME/bin:$GROOVY_HOME/bin:~/Source/maven/bin:$PATH


Obviously your paths will differ. Once this is done, we should be able to run our java, groovy, and mvn commands without errors.

2) Download GraphicsBuilder from Subversion

svn co http://svn.codehaus.org/groovy-contrib/graphicsbuilder/trunk graphicsbuilder


3) Download the Batik 1.7 distribution
Download a copy of the Batik 1.7 distribution and unzip it into our graphicsbuilder directory.

4) Use Maven to build GraphicsBuilder

cd graphicsbuilder
mvn


If everything works for you, then proceed to the next step. For me, I ran into two problems. The first problem was that top level pom.xml referenced groovy-all-minimal as a dependency but the other pom.xml files referenced groovy-all as a dependency. This caused Maven to complain about a missing version and to fail. I fixed this by changing the top level pom.xml file to reference groovy-all:

--- pom.xml (revision 356)
+++ pom.xml (working copy)
@@ -77,7 +77,7 @@


org.codehaus.groovy
- groovy-all-minimal
+ groovy-all
${groovy-version}


This seemed to clear up Maven's problems and the build actually proceeded.

The other problem I ran into was that the Batik 1.7 jars weren't available in the Maven repositories so the build complained of missing dependencies. Fortunately Maven will allow us to install the required jars locally:

mvn install:install-file -DgroupId=batik -DartifactId=batik-awt-util -Dversion=1.7 -Dpackaging=jar -Dfile=batik-1.7/lib/batik-awt-util.jar
mvn install:install-file -DgroupId=batik -DartifactId=batik-util -Dversion=1.7 -Dpackaging=jar -Dfile=batik-1.7/lib/batik-util.jar
mvn install:install-file -DgroupId=batik -DartifactId=batik-gui-util -Dversion=1.7 -Dpackaging=jar -Dfile=batik-1.7/lib/batik-gui-util.jar
mvn install:install-file -DgroupId=batik -DartifactId=batik-ext -Dversion=1.7 -Dpackaging=jar -Dfile=batik-1.7/lib/batik-ext.jar
mvn install:install-file -DgroupId=batik -DartifactId=batik-svggen -Dversion=1.7 -Dpackaging=jar -Dfile=batik-1.7/lib/batik-svggen.jar
mvn install:install-file -DgroupId=batik -DartifactId=batik-dom -Dversion=1.7 -Dpackaging=jar -Dfile=batik-1.7/lib/batik-dom.jar
mvn install:install-file -DgroupId=batik -DartifactId=batik-svg-dom -Dversion=1.7 -Dpackaging=jar -Dfile=batik-1.7/lib/batik-svg-dom.jar
mvn install:install-file -DgroupId=batik -DartifactId=batik-parser -Dversion=1.7 -Dpackaging=jar -Dfile=batik-1.7/lib/batik-parser.jar
mvn install:install-file -DgroupId=batik -DartifactId=batik-xml -Dversion=1.7 -Dpackaging=jar -Dfile=batik-1.7/lib/batik-xml.jar
mvn install:install-file -DgroupId=batik -DartifactId=batik-gvt -Dversion=1.7 -Dpackaging=jar -Dfile=batik-1.7/lib/batik-gvt.jar


After that, I was able to kick off mvn and build everything.

5) Install GraphicsBuilder into GROOVY_HOME
If you want to play around with GraphicsBuilder from the commandline, the easiest thing to do is to install it in your GROOVY_HOME:

cp */lib/*.jar $GROOVY_HOME/lib/
cp */target/*.jar $GROOVY_HOME/lib/
cp */src/lib/*.jar $GROOVY_HOME/lib/
cp */src/bin/* $GROOVY_HOME/bin/
chmod +x $GROOVY_HOME/bin/graphicsPad
chmod +x $GROOVY_HOME/bin/svg2groovy


You may also want to grab the build of GraphicsBuilder 0.5.1 because I think it may have included another jar or two that wasn't covered above (MultipleGradientPaint.jar, TimingFramework-1.0-groovy.jar, swing-worker.jar, and swingx-0.9.2.jar).

6) Play with it
You can either test it by running the graphicsPad application or writing a script that calls one of the renderers:

import groovy.swing.j2d.*
import groovy.swing.j2d.svg.*

def foo = {
antialias('on')
circle(cx:0, cy:0, radius:300, borderColor:'black', borderWidth:4) {
multiPaint {
colorPaint('orange')
texturePaint(x:0, y:0, file:'/Users/jareed/Desktop/602.png')
}
transformations {
translate(x:500, y: 500)
}
}
circle(cx:300, cy:300, radius:150, borderColor:'black', borderWidth:4) {
multiPaint {
colorPaint('red')
texturePaint(x:0, y:0, file:'/Users/jareed/Desktop/602.png')
}
}
}

def gr = new GraphicsRenderer()
def sr = new SVGRenderer()

gr.renderToFile("/Users/jareed/Desktop/test.png", 1000, 1000, foo)
sr.renderToFile("/Users/jareed/Desktop/test.svg", 1000, 1000, foo)


which generates:
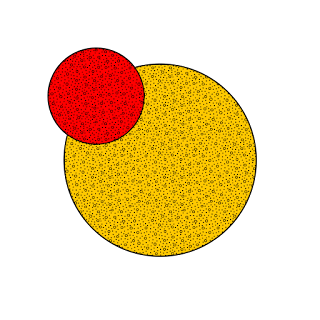
Nothing earth shattering, but it will be potentially interesting once I flesh out the project I want to use it on for. The best part, though, is that the SVG rendering works exactly as advertised. I had tried to do SVG rendering in the past using Batik's Graphics2D implementation (from a SWT app) and I couldn't get the background images to show up. Sweet!

Tuesday, June 03, 2008

Lincoln and Potsdam

Sorry for the lack of updates. I'm in Lincoln this week and then Potsdam, Germany next week for work. If anyone happens to be reading from either of those places and wants to grab a beer, shoot me an email. I'm hoping to get some work done on the flights, so hopefully I'll have stuff to blog about.

On a personal note, Elizabeth and I are in the process of buying a house. We found one we liked and offered on it last week. The offer was accepted and now we're just waiting for the sellers to do a few things and for our mortgage loan to come through. The plan is to close on the 20th or sooner, so when I get back from Potsdam, it looks like I'll be getting my stuff packed up to move.

The house is in Golden Valley (about 2 miles north of where we currently live). It's about 2000 sq. ft, with 4 bedrooms and 2 bathrooms. It's a one story, with a finished walkout basement. The lot is nice and large (for the city) and it's in what appears to be a nice, established neighborhood. I'm super pumped about the move as it means I can start doing things around the house (when I'm home, that is). I'll get some photos up when we start moving.

Thursday, May 22, 2008

Units DSL in Groovy

A while back I saw Guillaume Laforge's article about building a Groovy DSL for unit manipulations. I recently needed to implement something similar in a project, so I decided to take Guillaume's code and update it a bit. I wanted a nice way to package it up so I could quickly enable unit manipulation support on a particular class. I also added a pair of methods to make things more flexible. Here's my UnitDSL.groovy:

package org.psicat.model

import org.jscience.physics.amount.*
import javax.measure.unit.*

/**
* A helper class for setting up the Units DSL
*/
class UnitDSL {
private static boolean isEnabled = false;
private UnitDSL() { /* singleton */ }

/**
* Initialize the Units DSL.
*/
static enable() {
// only initialize once
if (isEnabled) return

// mark ourselves as initialized
isEnabled = true

// enable inheritance on EMC
ExpandoMetaClass.enableGlobally()

// transform number properties into an mount of a given unit represented by the property
Number.metaClass.getProperty = { String symbol -> Amount.valueOf(delegate, Unit.valueOf(symbol)) }

// define opeartor overloading, as JScience doesn\'t use the same operation names as Groovy
Amount.metaClass.static.valueOf = { Number number, String unit -> Amount.valueOf(number, Unit.valueOf(unit)) }
Amount.metaClass.multiply = { Number factor -> delegate.times(factor) }
Number.metaClass.multiply = { Amount amount -> amount.times(delegate) }
Number.metaClass.div = { Amount amount -> amount.inverse().times(delegate) }
Amount.metaClass.div = { Number factor -> delegate.divide(factor) }
Amount.metaClass.div = { Amount factor -> delegate.divide(factor) }
Amount.metaClass.power = { Number factor -> delegate.pow(factor) }
Amount.metaClass.negative = { -> delegate.opposite() }

// for unit conversions
Amount.metaClass.to = { Amount amount -> delegate.to(amount.unit) }
Amount.metaClass.to = { String unit -> delegate.to(Unit.valueOf(unit)) }
}

/**
* Add Units support to the specified class.
*/
static addUnitSupport(clazz) {
clazz.metaClass.setProperty = { String name, value ->
def metaProperty = clazz.metaClass.getMetaProperty(name)
if (metaProperty) {
if (metaProperty.type == Amount.class && value instanceof String) {
metaProperty.setProperty(delegate, Amount.valueOf(value))
} else {
metaProperty.setProperty(delegate, value)
}
}
}
}

/**
* Remove Units support from the specified class.
*/
static removeUnitSupport(clazz) {
GroovySystem.metaClassRegistry.removeMetaClass(clazz)
}
}


To enable the DSL, you have to call UnitDSL.enable(). This adds a few methods to the metaclasses on Number and Amount. The majority of the code in enable() is a straight cut and paste job from Guillaume's article.

I did add two methods. The first:

Amount.metaClass.static.valueOf = { Number number, String unit -> Amount.valueOf(number, Unit.valueOf(unit)) }


allows you to create an Amount using a Number and a String, e.g. Amount.valueOf(1.5, "cm").

The other new method:

Amount.metaClass.to = { String unit -> delegate.to(Unit.valueOf(unit)) }

allows conversions with the unit specified as a String, e.g. 1.5.m.to("cm")

The final enhancement I added was to create a addUnitSupport(clazz) method. This method overrides the setProperty() method of the passed class to support setting Amount properties as strings. All assignments in the following scenario are valid:

class Foo {
Amount bar
}

// test
UnitDSL.enable()
UnitDSL.addUnitSupport(Foo)

def foo = new Foo()
foo.bar = Amount.valueOf(3, SI.METER)
foo.bar = Amount.valueOf(3, "m")
foo.bar = Amount.valueOf("3m")
foo.bar = 3.m
foo.bar = "3m"


To use this code, you'll have to grab the latest JScience release.

Wednesday, May 21, 2008

Visualizer, Part 3: Poor Man's PDE Build

This is the third in my series (Part 1, Part 2) of posts about Visualizer. In this post I'll be talking about how to create a simplified PDE build.

As I mentioned in the previous post, Visualizer is built on OSGi. My preferred development environment for doing any Java development, but especially OSGi development, is Eclipse because of its wonderful JDT and PDE tooling. The PDE team has created an awesome environment for developing and managing OSGi bundles. However, one of the requirements that I had for Visualizer was that anyone could download the source code and build it, regardless of their IDE or environment preferences. PDE includes the ability to perform a headless build, but I didn't really want to expect the user to download Eclipse or to include a stripped down version of Eclipse in the Visualizer distribution just so the user could build it from the commandline. So I set out to create a "Poor Man's PDE Build" using just Ant.

Actually building the plugins with Ant is relatively simple. This short Ant file will build the plugin:

<?xml version="1.0" encoding="UTF-8"?>
<project default="build-plugin">
<property name="src.dir" value="src"/>
<property name="classes.dir" value="bin"/>
<property file="META-INF/MANIFEST.MF"/>
<property file="build.properties"/>

<path id="classpath">
<fileset dir="${dist.dir}">
<include name="*.jar"/>
</fileset>
<fileset file="${osgi.framework}"/>
<pathelement path="${java.class.path}"/>
</path>

<target name="init">
<mkdir dir="${classes.dir}"/>
</target>

<target name="compile" depends="init">
<echo message="Compiling the ${Bundle-SymbolicName} plugin"/>
<javac srcdir="${src.dir}" destdir="${classes.dir}" classpathref="classpath" debug="true"/>
</target>

<target name="copy-resources">
<echo message="Copying resources"/>
<copy todir="${classes.dir}">
<fileset dir="." includes="${bin.includes}"/>
</copy>
</target>

<target name="build-plugin" depends="compile, copy-resources">
<jar jarfile="${dist.dir}/${Bundle-SymbolicName}_${Bundle-Version}.jar" basedir="${classes.dir}" manifest="META-INF/MANIFEST.MF"/>
</target>

<target name="clean">
<delete includeemptydirs="true">
<fileset dir="${classes.dir}" includes="**/*"/>
</delete>
</target>
</project>


As you can see here, there really isn't much to the actual build. The best part is we can use the META-INF/MANIFEST.MF and build.properties created when we're working in PDE to control the build.

For a single bundle with no dependencies, this effectively duplicates the PDE build process. The difficulties comes in when you start having dependencies. If you use the headless PDE build, it will sort out all the dependencies for you and build your bundles in the proper order.

Implementing proper dependency resolution seemed awfully complicated, especially since PDE build already implements it. Fortunately, Visualizer doesn't require complicated dependency resolution because I've structured the bundles in a logical order. There are three levels of bundles: "core" which implement the main functionality, "ui" which implement the user interface to the core bundles, and "application" bundles that build on both the core and ui bundles.

Armed with this knowledge, we can structure a three stage build process where we first build all of the core bundles then all of the ui bundles and then all of the application bundles. To accomplish this, we have a master build.xml that calls out to the template build-plugin.xml file listed above using a subant task.


<target name="build-framework" depends="init">
<!-- build org.andrill.visualizer, org.andrill.visualizer.services* -->
<subant target="build-plugin" genericantfile="build-plugin.xml" failonerror="false">
<property name="dist.dir" value="../${build.dir}"/>
<property name="osgi.framework" value="../framework.jar"/>
<dirset dir=".">
<include name="org.andrill.visualizer"/>
<include name="org.andrill.visualizer.services*"/>
</dirset>
</subant>
</target>


Here you can see we build first the org.andrill.visualizer bundle and then all of the org.andrill.visualizer.services bundles. As we build each bundle, we copy the bundled JAR file to our dist.dir. Each time a bundle is built, it creates its classpath from all of the JARs in dist.dar. So even though there are dependencies among bundles, we are progressively fulfilling those dependencies by collecting the built bundles in dist.dir.

Once all of the "core" bundles are built, we can kick off the build of the ui bundles:


<target name="build-ui" depends="build-framework">
<!-- build org.andrill.visualizer.ui* -->
<subant target="build-plugin" genericantfile="build-plugin.xml" failonerror="false">
<property name="dist.dir" value="../${build.dir}"/>
<property name="osgi.framework" value="../framework.jar"/>
<dirset dir=".">
<include name="org.andrill.visualizer.ui*"/>
</dirset>
</subant>
</target>


Finally we can build all of the "application" bundles by excluding everything we've already built:

<target name="build-apps" depends="build-framework, build-ui">
<subant target="build-plugin" genericantfile="build-plugin.xml" failonerror="false">
<property name="dist.dir" value="../${build.dir}"/>
<property name="osgi.framework" value="../framework.jar"/>
<dirset dir=".">
<include name="*.*"/>
<exclude name="org.andrill.visualizer"/>
<exclude name="org.andrill.visualizer.services*"/>
<exclude name="org.andrill.visualizer.ui*"/>
<exclude name="${build.dir}"/>
<exclude name="${dist.dir}"/>
</dirset>
</subant>
</target>


You can check out the full build file at: build.xml and build-plugin.xml.

It's not nearly as neat as just kicking off a PDE build and letting it do all of the hard work of figuring out the dependencies for you. However, I'm rather fond of my approach because it keeps me honest. If I create a new bundle and it starts breaking the build, then I know I need to go back and make sure I've thought through the dependencies and am not trying to mix "core" code with "ui" code and such. And there's no need to bundle Eclipse with the source to build the thing.